Creating a DIY Headband Organizer is so simple and inexpensive! You probably already have a few of the materials already on hand. It will take you about 15-20 minutes to complete. I made this while my youngest was napping and my daughter was crafting right beside me. She even took some of the photos for me. Mommy’s little helper! Makes me SMILE! 🙂
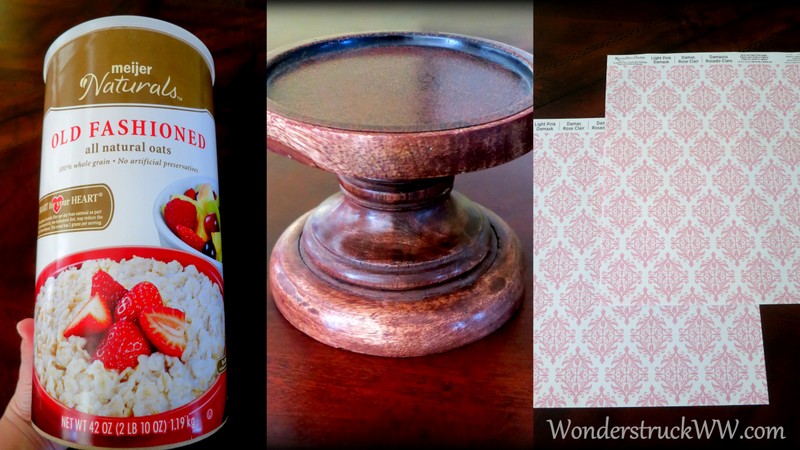
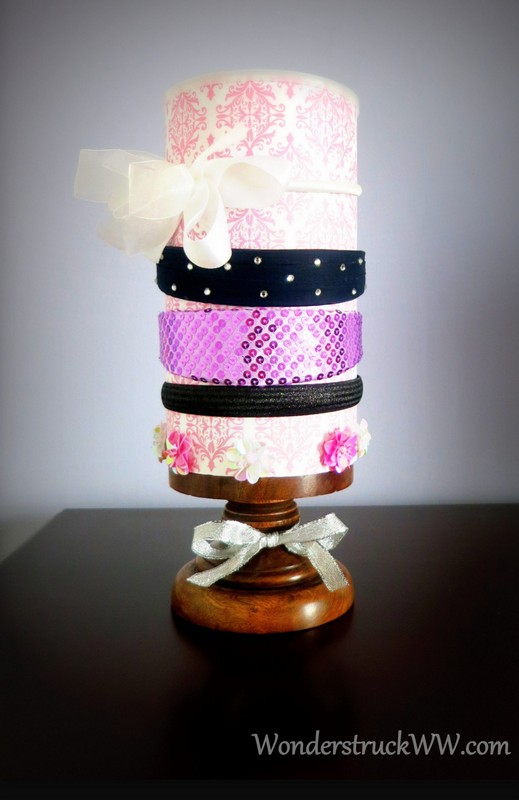
I was inspired to create a Headband Organizer for my daughter after browsing through Pinterest one night. Two of the main materials are a candlestick and an empty oatmeal canister, which we have a ton of! (Oatmeal is a regular staple in our house.) A little glue and a little decorating, and the headband organizer would be complete.
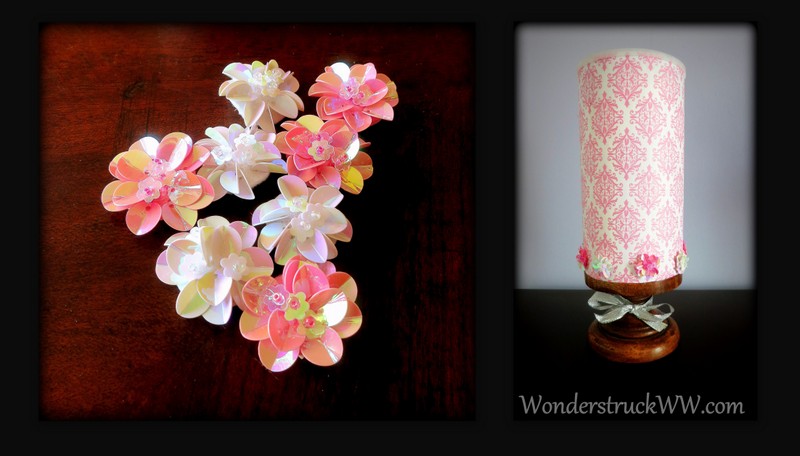
One stop to Michaels and I had everything I needed in a 5 minute shopping trip! I used a 50% off coupon on a wooden candle stick, so I got it for $5.00! Score!! A couple sheets of elegant scrapbook paper and a few iridescent embellishments to add a little girly bling, and I was ready to go.
Let’s get started on the details!
Here is what you will need:
- 1 empty can of oatmeal (I used a 42 oz can)
- a candlestick
- 2 sheets of scrapbook paper
-
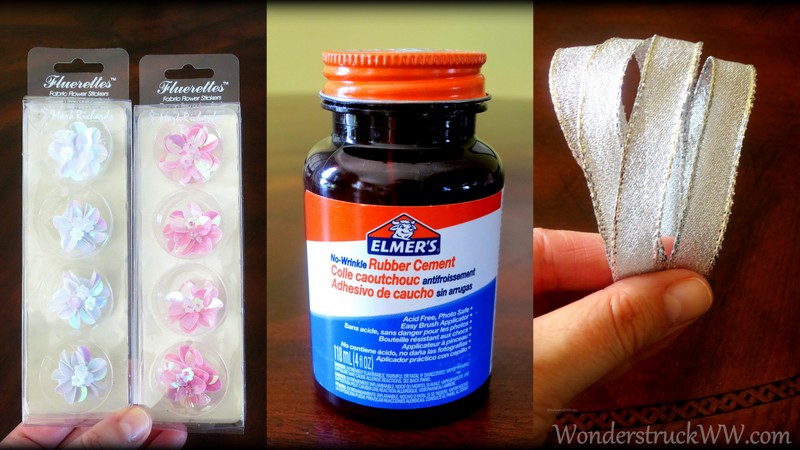
embellishments of your choice (optional) I chose to embellish the head band organizer at the bottom to add a little sparkle. It worked out perfectly. Not only do they add a little sparkle, but they prevent the headbands from sliding down
- rubber cement
- ribbon (optional) I already had some shimmery silver ribbon, so I decided to add a little extra touch
-
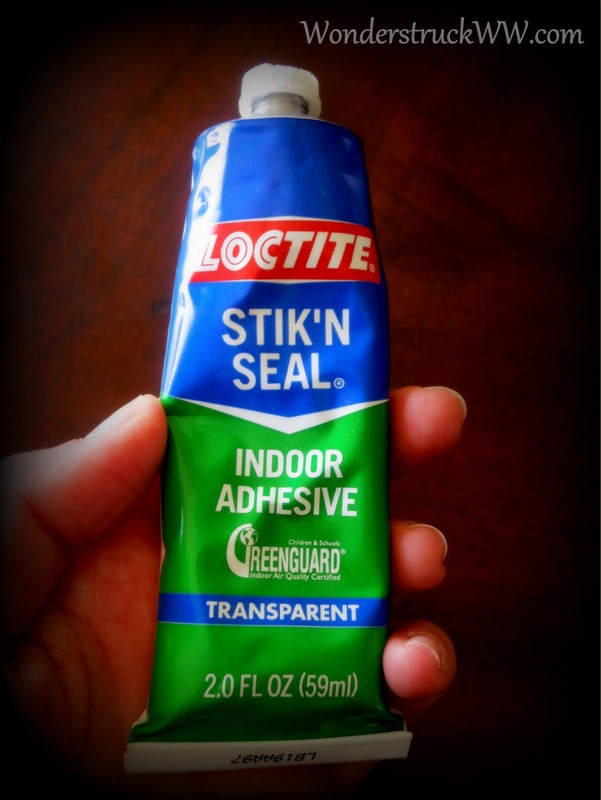
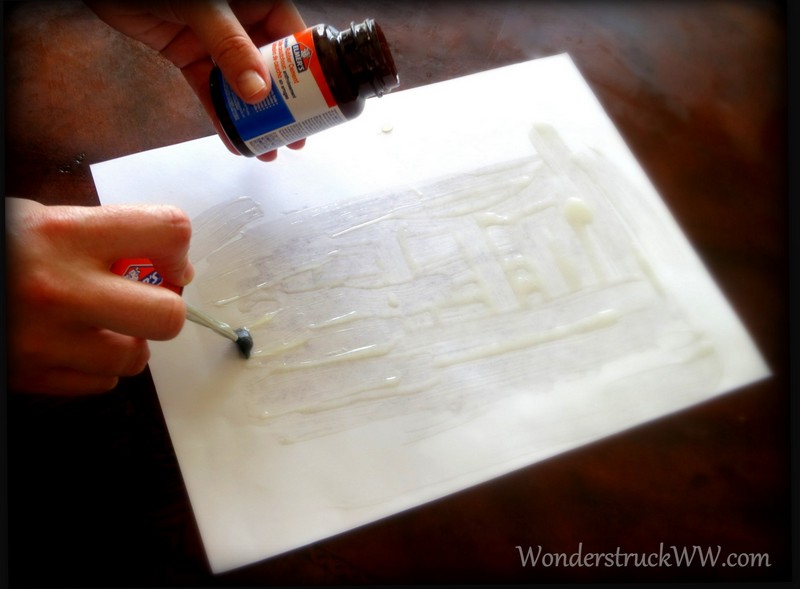
indoor adhesive
-
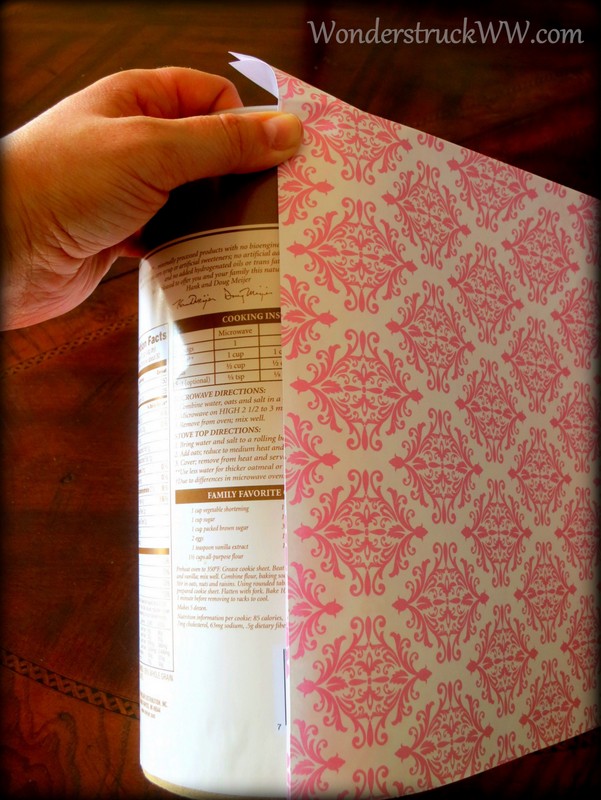
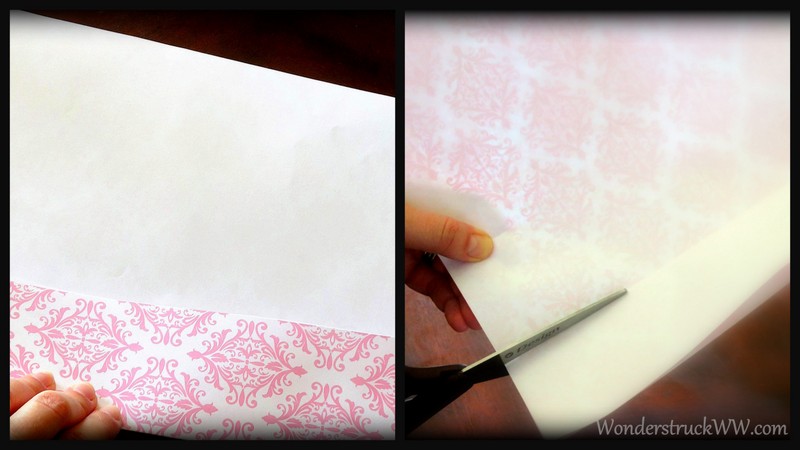
Measure your scrapbook paper to fit the oatmeal can
-
fold the paper and cut to size
-
cover the back of each piece of scrapbook paper with rubber cement, paying close attention to the edges
-
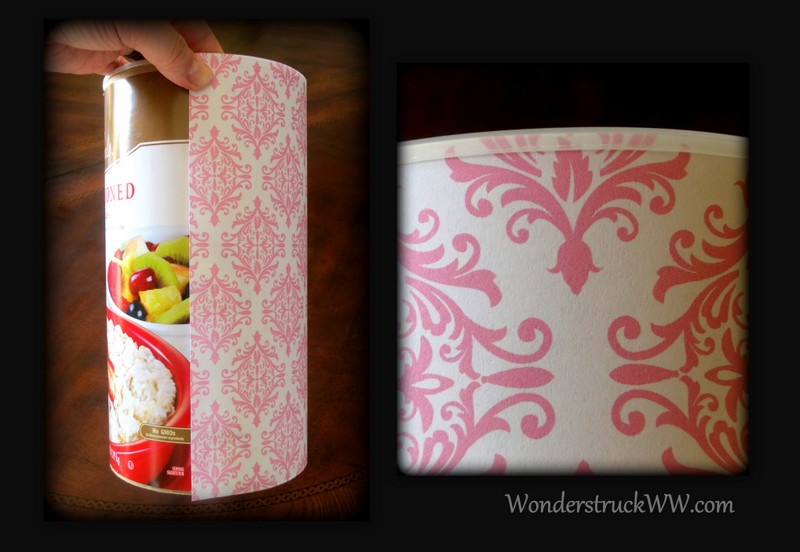
carefully wrap the scrapbook paper around the oatmeal canister
-
smooth out any bubbles
- lift the edge of the plastic rim at the top of the oatmeal canister and work the paper underneath it. This will allow the lid to fit nicely when completed and prevent the paper from tearing
-
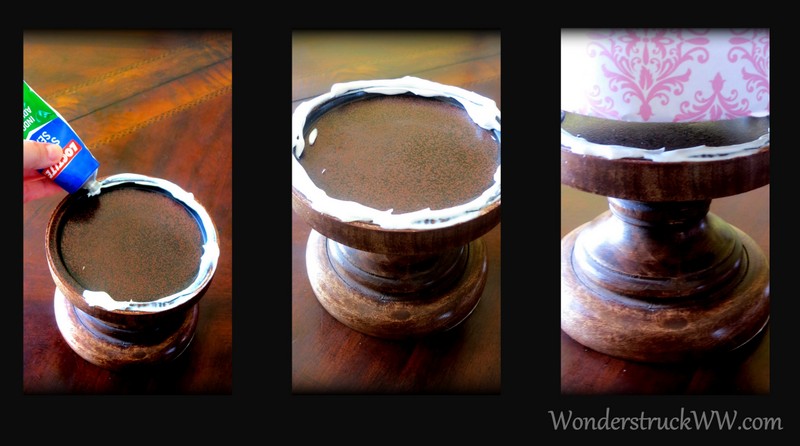
liberally apply the indoor adhesive to the rim of the candlestick {FYI: I used hot glue the first time I made a headband organizer and it was NOT strong enough. It worked briefly and then the oatmeal canister popped off. I fixed the organizer with indoor adhesive. The organizer has been dropped on the floor several times (by a couple of sweetie pies 🙂 ) and it still looks great}
- place the oatmeal canister on the candlestick and press firmly
- take a paper towel and wipe away any excess adhesive that leaked out after applying pressure
-
If you choose, embellish the bottom of the canister with whatever your heart desires (you can use any type of glue/adhesive to keep them in place)
- tie a ribbon around the candlestick (optional)
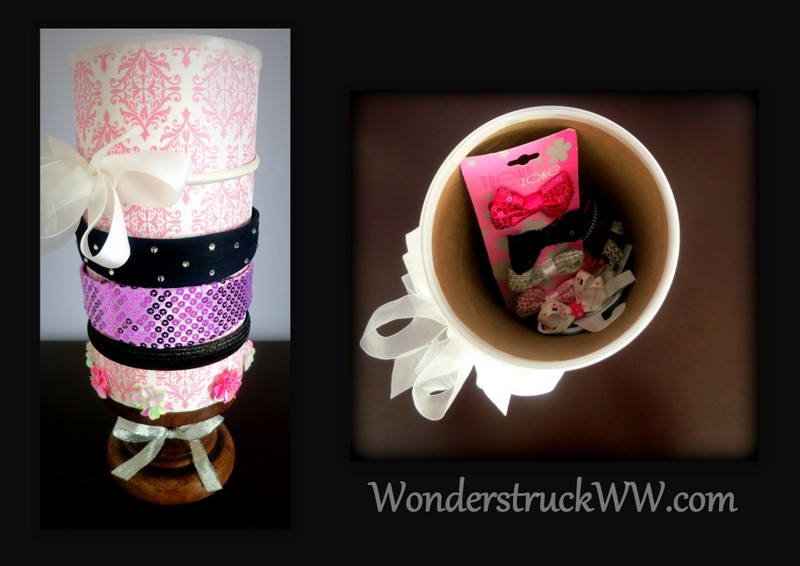
And there you go! A DIY Headband Organzier.
It was so simple, fun and inexpensive to make. It’s practical and it looks pretty too!
And the added BONUS:
You can remove the canister lid and store clips, barrettes, ponytail holders and bows inside! Pretty cool, right?
Do you think you might give it a try?
Have you been working on any DIY projects that you would like to share?
I would love to hear them!
Have a good weekend!
xo
Colette


That is adorable, Colette, and so practical when you have a little girl in your house. I think it’s very cool that your daughter helped and her pictures were great.
I might try this. We are always losing headbands. I have a feeling my will not be as cute as yours. It might just be an empty outmeal can. 😉
My daughters have way too many headbands and this is a super cute way to organize them. Thanks for posting this great craft.